Conduit Crystal is the resource that stops a lot of Subnautica 2 players cold. You’ve pushed past the Alien Ruins, picked up the Bioscanner blueprint, swam back to base excited to build it, and then you open the recipe screen and realize you don’t have any. So you head back out. You swim the same stretch of seafloor for twenty minutes. You come home with one. The recipe wants three.
This is not a you problem. Conduit Crystal is genuinely scarce in the current early access build, and the game gives you almost nothing in terms of direction. This guide covers where to find it, what to expect when you get there, how to read the environment so you’re not swimming past nodes, and how to set yourself up so you’re not making the same 1,700-meter round trip six times.

What Is Conduit Crystal Actually Used For?
Before getting into the hunt, it’s worth knowing exactly how much of this stuff you’re going to need across your entire playthrough because the answer is more than you probably think, and going out underprepared is how you end up making three separate trips.
The Bioscanner
This is almost certainly why you’re reading this. The Bioscanner is one of Subnautica 2’s most significant early progression upgrades, built at the Mod Station. It evolves your standard Alterran Scanner with new biological scanning capabilities and opens up the Biomod unlock path. The recipe costs 3 Conduit Crystals and 2 Enameled Glass. Three crystals sounds manageable until you realize individual nodes yield exactly one unit each, they don’t cluster reliably, and the area where they spawn is 1,700 meters from your Life Pod with hostile fauna patrolling it.
The Feedback Resonator
This is the Sonic Resonator upgrade that lets your weapon actually damage shielded enemies. If you’ve been hitting Bloom Cankers and watching your attacks do nothing, this is the fix. Without the Feedback Resonator, those encounters are a war of attrition that you’re likely losing. Conduit Crystal is the core energy component in the recipe, and you’ll need it alongside other advanced materials at the Fabricator.
Advanced Electrical Recipes
Conduit Crystal also appears in higher-tier electrical crafting, Advanced Batteries and Entangled Power Cells specifically. These become relevant as you push deeper into the game and start needing sustained power for equipment that flat-out drains standard cells. It’s not an immediate concern early on, but it means demand for the resource doesn’t stop after you finish the Bioscanner.
The bottom line on quantity: Plan for a minimum of 8 to 10 crystals if you want to cover the Bioscanner, the Feedback Resonator, and have a buffer for electrical recipes without making repeated runs. Farm more than you think you need on your first serious expedition. That advice will save you two hours.

Where Conduit Crystal Spawns
Conduit Crystal is found in the Angel Comb region, which sits past the Alien Ruins in the second main area of the game. The key navigation landmark is a massive alien control center structure approximately 1,700 meters east of your starting Life Pod. If you haven’t been out that far yet, this is serious distance, this is not a casual early-game swim, and you will not stumble across the area by accident while doing other things.
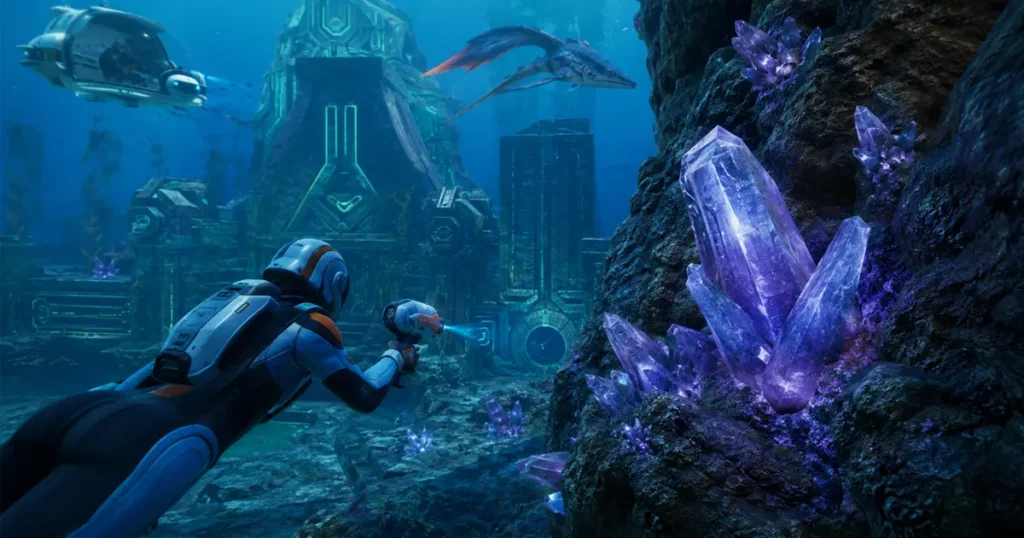
The crystals grow attached to surfaces: rock faces, alien architecture walls, and occasionally the seafloor. That variety is part of what makes them hard to find. Most resources in survival games either spawn on the ground where you naturally look, or they’re visually distinct enough to catch your eye. Conduit Crystal does neither reliably. It’s a relatively small formation, it blends with the alien structures around it, and it shows up in spots you wouldn’t naturally check, like halfway up a rock face or tucked behind a structural protrusion on the alien buildings.
Individual nodes yield one unit. That’s the core frustration. There’s no equivalent of breaking a boulder and getting five pieces. You find the node, you harvest it, you get one Conduit Crystal, and then you start looking for the next one.
The one partial exception: the floor area near the Angel Comb itself occasionally produces two formations close together. It seems to be the only consistent multi-spawn in the region, and even that is not guaranteed, whether it’s a fixed spawn or a procedural quirk is unclear in the current build. Everywhere else, treat each node as a standalone find.
What to Bring Before You Go
Going out to the Angel Comb region underprepared is a reliable way to lose your vehicle, run out of supplies, and come back with fewer crystals than you needed. Here’s the actual checklist:
Vehicle: Upgraded Tadpole, not stock. The terrain near the alien structure gets tighter as you approach the crystal locations. You need a vehicle with good depth handling and enough speed to get out fast if something large starts tracking you. An unupgraded Tadpole will get you there, but you’ll be nervous the whole time, and nervous players don’t search surfaces carefully.
Power cells: Bring two or three spares. This is not optional. The 1,700-meter trip drains cells at a rate most players underestimate the first time, and that’s before you factor in running the Scanner Room on the far end. Running out of power 900 meters from home is a specific kind of bad that this game inflicts regularly.
Scanner Room components. You want to set up a mini base near the alien structure before your first farming run, not just swim around hoping to spot crystals by eye. More on the Scanner Room setup below.
Medkits and oxygen. The area has smaller aggressive fauna and at least one category of large patrol creature that gets territorial near the alien structures. You will likely take damage during a thorough run. Go in stocked.
Food and water for extended runs. If you’re going to be out there long enough to sweep the whole region properly, which is the correct approach, make sure basic survival needs aren’t forcing you home early.

How to Navigate to the Crystal Zone
Leave your Life Pod and head east. Keep heading east. At roughly 1,700 meters, the alien control center structure becomes visible. It’s large enough that you won’t miss it once you’re in range, but the swim itself is long and gives you nothing interesting to look at, which is its own kind of exhausting.
Once the structure comes into view, do not drive straight into the tightest sections of terrain around it. The rock formations and alien architecture create passages that are fine for swimming but awkward for your vehicle. Park the Tadpole in an open area near the outer edge of the structure, somewhere with clear sightlines and no chokepoints. This matters because if a large creature shows up while you’re inside collecting, you want to be able to reach your vehicle quickly without navigating a maze.
Setting Up the Scanner Room
This step is what separates a productive run from an exhausting one. Before your first serious crystal farming session, establish a small base near the alien structure. It doesn’t need to be elaborate, a power source, a Scanner Room, and a bioreactor or power cell charger if you can spare the materials.
The Scanner Room lets you target specific resources and shows their locations on your HUD. Set it to scan for Conduit Crystal specifically. The range won’t cover the entire region at once, but it dramatically reduces the amount of blind swimming you’d otherwise do. Without it, you’re checking every surface by eye in a large area with poor visibility near the alien structures. With it, you’re swimming to marked locations.
Important caveat: the scanner may only show one signal at a time even when multiple crystals are nearby. This is not a bug you need to troubleshoot, it’s just the way the signal system works at this node density. When you reach the highlighted location and collect the first crystal, don’t turn around. Stay in the area and check the surrounding surfaces on foot before returning to the scanner. There’s a real chance another crystal is within 20 to 30 meters of the first one, just not highlighted because the scanner was already pointing at something closer.
Place beacons at every confirmed spawn location you find. Crystals appear to respawn over time in the current build, and having marked spots means your second and third runs are significantly faster than the first.
What You’re Up Against Out There
The Angel Comb region is not the most dangerous place in Subnautica 2, but it’s not friendly either. Expect a mix of smaller aggressive fauna that will harass you while you’re trying to carefully scan surfaces, annoying, occasionally damaging, and enough of a distraction that players sometimes miss a crystal node ten meters away because they’re watching their health bar.
The bigger concern is the patrol creatures near the alien structures. They don’t constantly aggro, but they do have territory, and if you spend enough time in their patrol path you’ll get their attention. The recommended approach is to stay close to terrain when possible, it gives you cover and breaks line of sight, and retreat to your vehicle if something large starts tracking you. Don’t try to fight patrol-tier creatures while also managing oxygen and trying to spot resources. That’s how you lose all three at once.
Visibility near the alien structures is reduced by the architecture itself and by whatever biological growth covers parts of the area. Factor this into your pace. Moving slowly and checking walls at multiple angles is more productive than swimming fast and doing broad visual sweeps.
Efficient Farming: The Full Strategy
If you need enough crystals to cover the Bioscanner, the Feedback Resonator, and have leftover stock for electrical recipes, one quick run won’t do it. Here’s the approach that avoids making the 1,700-meter trip more times than necessary:
First run: establish the base. On your initial expedition, prioritize setting up the Scanner Room outpost over collecting crystals. Get the infrastructure in place so every subsequent run is scanner-assisted. Collect whatever crystals you naturally find while building, but don’t treat this as your farming run.
Second run: full sweep with the scanner. This is your primary farming session. Come in stocked, park the Tadpole safely, activate the Scanner Room, and work through each highlighted node methodically. After each pickup, pause and manually check the surrounding surfaces for unhighlighted nodes. Sweep the Angel Comb floor area specifically, it’s the most consistent multi-spawn location in the region.
Beacons at every confirmed location. Drop a beacon when you find a crystal. Every one. These become the backbone of your third and fourth runs, letting you skip the scanning phase and go straight to the high-yield locations.
Third run onward: beacon route. Hit your marked locations first, scan for new signals, and sweep any surfaces you didn’t cover on previous runs. By the third expedition you should have enough crystals to complete the Bioscanner and the Feedback Resonator with some buffer remaining.
A Note on the Current Build
Subnautica 2 is in early access, and resource spawn rates and crafting recipes are still actively being tuned. The information here reflects the current state of the game, but if something doesn’t match what you’re seeing, particularly around crystal node density or recipe requirements, check recent patch notes before assuming you’re looking in the wrong place. The Conduit Crystal spawn behavior in particular feels like the kind of thing the developers may adjust as player feedback comes in about how scarce it actually is in practice.
Still working through Subnautica 2’s early access content? Check out our other guides on the site for help with silver farming, sulfur locations, and unlocking heat tolerance for the deeper zones.
Got a tip on a Conduit Crystal spawn we missed? Drop it in the comments, the map is big and there’s probably more out there than any single run has turned up so far.