So you just started Subnautica 2 and you have absolutely no idea what you’re doing. You’re floating in the middle of an alien ocean, your oxygen is ticking down, and something large just swam past you in the dark.
Welcome. This is normal. Subnautica 2 does not hold your hand. It drops you into a water planet called Proteus and basically says “good luck.” There’s no map, no tutorial pop-ups telling you what to do next, and the ocean gets very deep, very fast.
But once you understand the basics, the game opens up in a way that’s genuinely hard to put down. This guide covers everything a new player needs to know, from your first five minutes in the Lifepod to building your own underwater base and crafting your first submarine.

First Things First: Understand Where You Are
You play as a Pioneer. Your ship went down, the other colonists are missing or worse, and you survived by landing in a Lifepod. That Lifepod is now your entire world for the first chunk of the game.
Here’s what’s inside it and why each thing matters:
The NoA Terminal is a screen that shows you objectives. It stands for Noetic Advisor, and it will periodically point you toward things worth investigating, like blackboxes left behind by lost colonists, sunken habitats, and strange alien lifeforms. When you have no idea where to go, check this first.
The Biobed is your respawn point. If you die, which will happen, you wake up here. Think of it as your save file made physical.
The Fabricator is how you make almost everything in the game. Tools, food, gear, upgrade components. You will use this constantly.
The Pod Locker is storage. It holds 35 items. That sounds like a lot until you start picking up materials from the ocean floor.
There Is No Map. Here’s How to Navigate
This trips up almost every new player. Subnautica 2 has no in-game map at all.
What you have is a compass at the top of your screen and your character’s coordinates in the bottom-right corner when you pause the game. That’s it.
The trick is to treat the Lifepod as your anchor point. Every time you go exploring, note the direction you’re heading and roughly how far you’ve gone. When you get the Habitat Builder later, you can craft Beacons (1x Titanium, 1x Copper each) and plant them at spots you want to return to. You can label them whatever you want.
Drop a Beacon every time you find a good farming spot or an interesting structure. Future you will be very grateful.
Survival Mode: Four Things That Can Kill You
If you’re playing on Survival Mode (which most players are), you’re managing four stats at once: oxygen, health, hunger, and thirst. Let’s go through each one properly.
Oxygen is the most immediate threat. You start with 45 oxygen, which drains quickly the moment you go underwater. When it hits zero, the screen goes dark. If you can’t reach the surface or a base entrance within a few seconds, you’re dead.
The first upgrade you should push toward is the Standard Air Tank, which raises your cap to 75. After that, the High Capacity Air Tank takes it to 120. You can also watch for abandoned scuba tanks in the environment, they have air bubbles that give you a bit back in a pinch.
The Rebreather is another tool worth crafting. It slows down how fast you burn through oxygen when you dive deep. Surfacing, entering a base through a hatch, or getting into a vehicle all restore your oxygen automatically.
Health drops when you take damage from creatures or hazards in the environment. The fastest way to recover is with First Aid Kits, which restore 50 health each. There are also bulbous pink plants called Acid Raions scattered around that carry a Medical Gel Sac, which restores 10 health. Small but useful in an emergency.
Hunger builds up over time. In the very early game, you’re mostly eating Nutrient Blocks, which give you +40 food. The problem is that to eat anything else, you need to unlock the Digestion Adaptation upgrade, which comes later through exploration. Once you have it, the Fabricator’s Sustenance tab lets you cook fish, make jerky, and prepare other food from the alien wildlife around you.
Thirst is almost cruelly ironic in a game set on a water planet. All that ocean water is salt water and you can’t drink it. The solution is catching Water Slugs, small critters that float around the environment. Take one to the Fabricator and it becomes a drinkable consumable worth +40 water.

The Scanner: Your Most Important Early Tool
Almost nothing in Subnautica 2 is available to craft right away. Blueprints have to be unlocked by scanning objects in the world.
The Scanner is what makes that possible. Craft it at the Fabricator using 2x Titanium, 2x Quartz, and 1x Battery. Once it’s in your hands, look at its screen for yellow pips. Those pips show you what’s nearby and scannable.
Scan wrecked equipment. Scan unusual structures. Scan flora you haven’t seen before. Scan everything. Every scan either unlocks a blueprint or gives you data points you’ll need later.
This is how Subnautica 2 teaches you what’s in the world without using tutorial windows. You discover it yourself.
How to Actually Mine Resources
Early on, you can pick up small loose materials with your hands. That covers the basics but it gets limiting fast.
The Survival Multitool, which costs 3x Titanium to craft, lets you break open medium-sized mineral nodes. That opens up a lot more resources.
The major upgrade after that is the Sonic Resonator. It costs 1x Basic Battery, 2x Titanium Ingot, 2x Lead, and 1x Wiring Kit. Scan it to unlock the blueprint first, then build it. The Sonic Resonator destroys bloom cankers and large deposits in one hit and usually drops several resources at once. Mining goes from tedious to efficient the moment you have this.
Keep Your Batteries Charged
A lot of tools in Subnautica 2 run on batteries. The Scanner, the Sonic Resonator, and others will stop working if you let them drain completely.
Craft Basic Batteries using 2x Copper and 1x Acidic Raion Pouch. To swap a battery in or out of a tool, hold the tool and press R. It pulls from your inventory.
Once you have a base set up, build a Battery Terminal using 2x Titanium, 2x Quartz, and 1x Copper Wire. Drop dead batteries onto it and they fully recharge in seconds. It’s a small convenience that saves a lot of frustration during long dives.
Storage Will Be a Problem. Plan for It.
Your starting inventory holds 20 items. That fills up faster than you expect once you start gathering materials in bulk.
The Pod Locker in your Lifepod gives you 35 more slots. When you build a base, Wall Lockers hold 20 items each and Floor Lockers hold 30. Portable Lockers, which you can find or craft, carry 15 items and go anywhere with you.
Build storage early and build more than you think you need. Running back to drop off materials mid-dive because your inventory is full gets old quickly.
You can also find Endurance upgrades while exploring that permanently increase how much you can carry. These are worth seeking out whenever you come across them.

Hostile Creatures and How to Handle Them
Not everything in the ocean of Proteus wants to eat you. Most creatures are passive or curious at worst.
But some of them are actively dangerous. Marrowbreachers and Needler Mangoes are two early examples that will charge at you if you get too close.
The Distraction Flare is your best early defense. It costs 1x Titanium and 1x Quartz to craft. Light one and aggressive creatures will steer away from you. Carry at least a few whenever you’re heading into new territory.
Then there are Leviathans. These are enormous creatures that roam the deeper areas of the ocean. A Distraction Flare does nothing to a Leviathan. Fighting one as a solo swimmer is almost always fatal.
The best approach is avoidance. Give them a wide berth. When you eventually unlock the Tadpole submarine, the vehicle absorbs damage instead of your character, which makes encounters survivable. Until then, treat Leviathans as no-go zones.
Build a Base When You Can
The Habitat Builder is an item you’ll unlock through exploration and scanning. Once you have it, setting up your own base becomes one of the most satisfying parts of the game.
You need a good amount of Titanium to get started, plus some Copper and Quartz. From there you can build corridors, rooms, storage, workstations, and more.
A base gives you a safe oxygen zone underwater, more storage than you could ever fit in a Lifepod, and the ability to build specialized equipment like the Battery Terminal and eventually the setup needed to build your submarine.
Pick a location that’s near resources you’re actively using. You can always expand later.
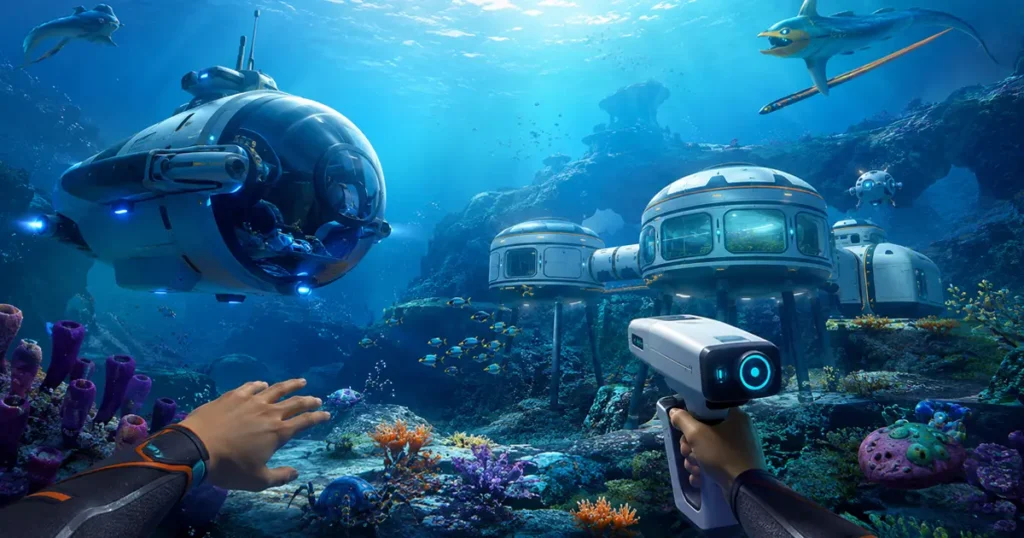
The Tadpole: Your First Submarine
The Tadpole is a personal submersible and it changes how exploration feels entirely. You move faster, go deeper safely, and survive encounters that would kill you on foot.
To build one, you first need to find and scan three Tadpole Fragments out in the world. Those unlock the blueprint. Then you need to build the infrastructure:
- Moonpool: 5x Titanium. This is where the Tadpole docks inside your base.
- Tadpole Dock: 2x Titanium Ingot, 1x Silver Ingot, 2x Copper Wire.
- Vehicle Fabricator: 2x Titanium Ingot, 1x Copper Ingot, 2x Glass.
The Tadpole core itself costs 2x Titanium Ingot, 1x Glass, 1x System Chip, and 1x Power Cell.
It’s a lot of materials but start collecting early. Once you find Tadpole upgrade modules in the world, also build the Modification Station (2x Titanium, 2x Celestine, 2x Copper) so you can actually install them.
Adaptations Change How Your Character Works
Scattered around Proteus are large pink bulbs called Angel Combs. Interacting with one gives you an Adaptation, which is basically a DNA modification that grants your character a new ability.
Some of the most useful early ones include the ability to digest alien food (which unlocks a huge range of options for managing hunger) and increased heat resistance for diving into warmer biomes.
Adaptations are permanent upgrades, not gear. There’s no slot management or equipping. You just get the ability and keep it.
Biomods and Biobed Upgrades Are Worth Hunting For
Two other upgrade systems are worth knowing about.
The Bio Lab inside the Welcome Center has Biomods, which work as active and passive skills. One early example lets you dash while swimming underwater. That sounds minor until you’re being chased and suddenly you really need it.
Colonist bunkers and abandoned habs are hidden across the ocean floor, but they contain Biobeds. These grant permanent upgrades: more inventory space, extra tool slots, improved survivability. They take effort to find but every one is worth it.
Make a habit of exploring structures you come across rather than swimming past them.
One Last Thing: Explore Without an Objective Sometimes
Subnautica 2 rewards wandering. Biomes full of bioluminescent coral, carved alien glyphs on ancient structures, creatures that have no equivalent on Earth. The game hides genuinely surprising things in places you wouldn’t think to look.
The objectives from the NoA Terminal will keep you on track for the story. But some of the best moments come from picking a direction, diving down, and seeing what’s there.
Don’t rush. The ocean is big and strange and that’s the whole point.
Subnautica 2 is available now in Early Access on the Epic Games Store.
Got a question about something specific in the game? Drop it in the comments. And if this guide helped you survive your first few hours, check out our Subnautica 2 guide for what to do next.


useful beginner guide. a map helps new players plan oxygen routes resources and base spots before they swim too deep.